Setting up and Assigning Routing Paths - Performance Pro
Admins have the ability to set up an appraisal approval path in Performance Pro which is called routing. Performance Pro uses two methods when setting up routing: Manual Route and Auto Route.
Manual Routing
Appraisers have the ability to manually choose the routing recipient from either an upline manager or Admin User.
Auto Route
Appraisals (or forms) documents will follow a pre-determined path of routing recipients. In order to utilize Auto Routing, Routing Paths must first be created and then assigned. Each person will receive a notification when the item is routed to them (if Routing Email Notification has been enabled). If Complete Notification is activated on the Routing Setup tab, appraisers will receive notification when routing of the document is complete.
Adding a New Routing Path
Please note that company units must first be created in order to assign them to a Routing Path. Please refer to the following article to create your company units. Adding, Editing, and Deleting Company Units
A routing path is a series of steps that an appraisal can take when going through an approval process. Your route path could consist of just one step (route it only to HR) or multiple steps (route it to the VP the SVP then to HR). Please follow these steps to add a new routing path:
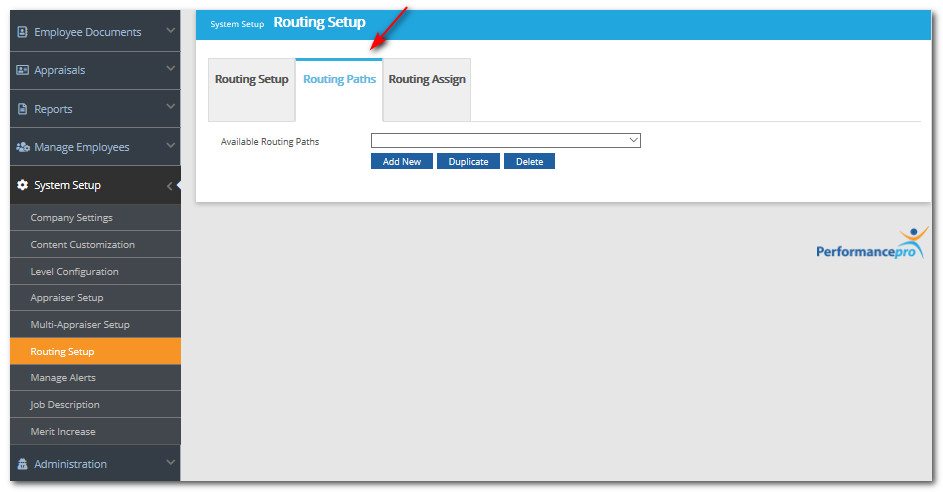
- Click System Setup.
- Click Routing Setup.
- Click the Routing Paths tab.
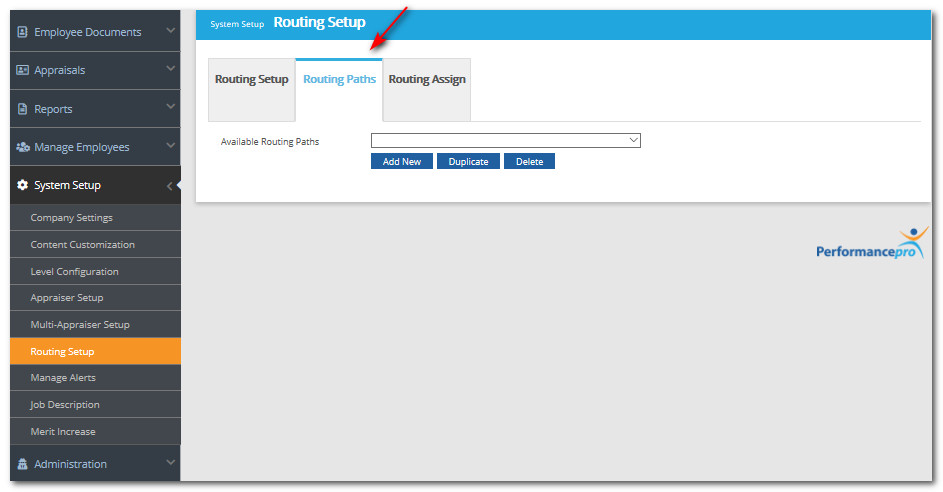
- Click Add New.
- Enter the Routing Path name.
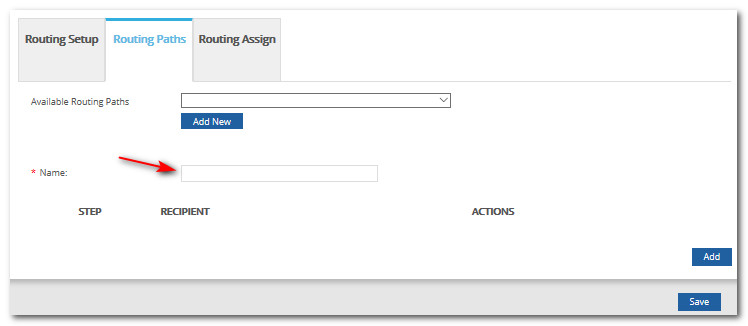
- Click Add.
- From the "Recipient" dropdown, choose the first Recipient in the Routing Path.
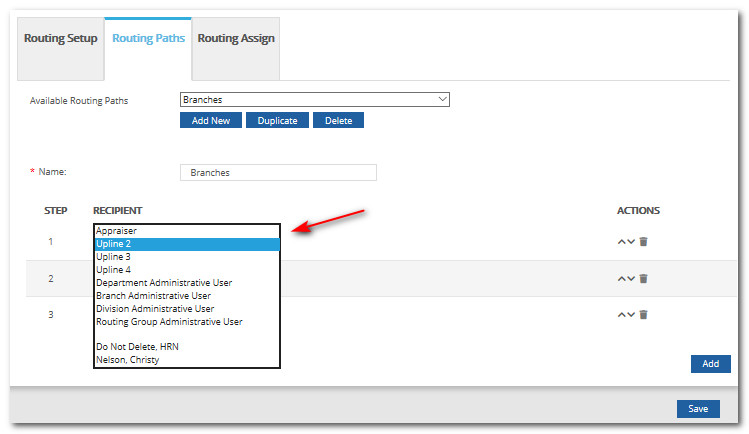
- Repeat until you have chosen all Recipients in the Routing Path.
- Click Save.
Assigning a Routing Path
Once a Routing Path is created it must then be assigned. The paths can be assigned by one of the following levels:
-
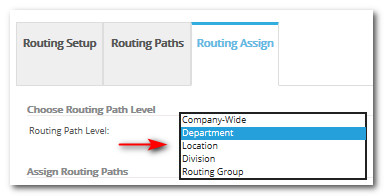
Company-wide. If a Routing Path Level is designated as Company-wide, then every appraiser within your organization will utilize this Routing Path.
-
Company Unit Routing. If a Routing Path Level is designated by company unit (Department, Location, Division, Routing Group), a list of your company units will display. You can then assign different Routing Paths for each company unit.
Please note that company units must first be created in order to assign them to a Routing Path. Please refer to the following article to create your company units. Adding, Editing, and Deleting Company Units -
Routing Not Required Path. A routing path titled “Routing Not Required” is automatically available. When the "Routing Not Required" path is assigned to a group, documents for employees in that group will not need to be routed in order to be completed.
To assign a routing path:
- Click System Setup.
- Click Routing Setup.
- Click the Routing Assign tab.
- From the "Routing Path Level" dropdown, select a Routing Path Level.
- From the "Assign Routing Paths" dropdown, choose a routing path.
- Click Save.

- Click System Setup.
- Click Routing Setup.
- Click the Routing Paths tab.
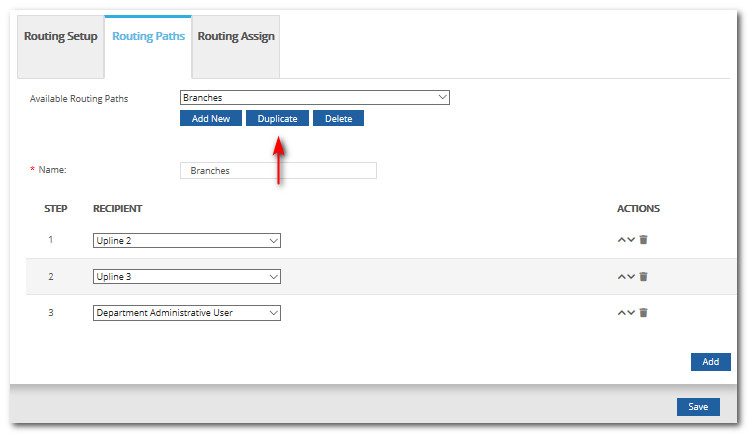
- Select the Routing Path you wish to duplicate.
- Click Duplicate.
- Click Yes to confirm the duplication.
Note: The duplicated Routing Path will appear in the Available Routing Paths dropdown with (Copy) attached to the end of the title. You can rename it as desired.
Renaming a Routing Path
- Click System Setup.
- Click Routing Setup.
- Click on the Routing Paths tab.
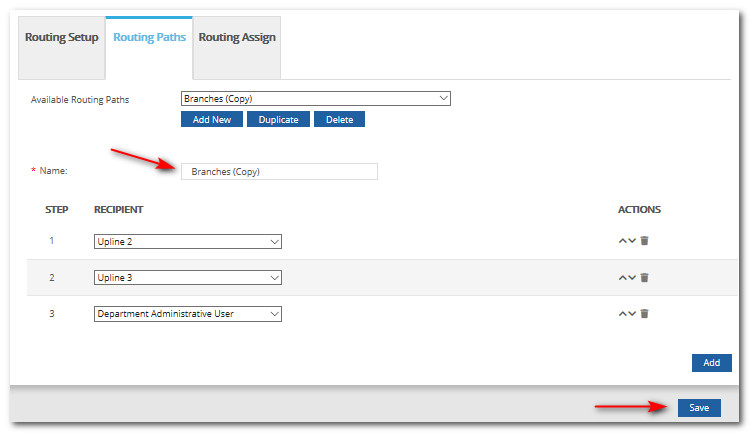
- From the "Available Routing Paths" dropdown, select the Routing Path
- Edit the name.
- Click Save.
Deleting a Routing Path
- Click System Setup.
- Click Routing Setup.
- Click the Routing Paths tab.
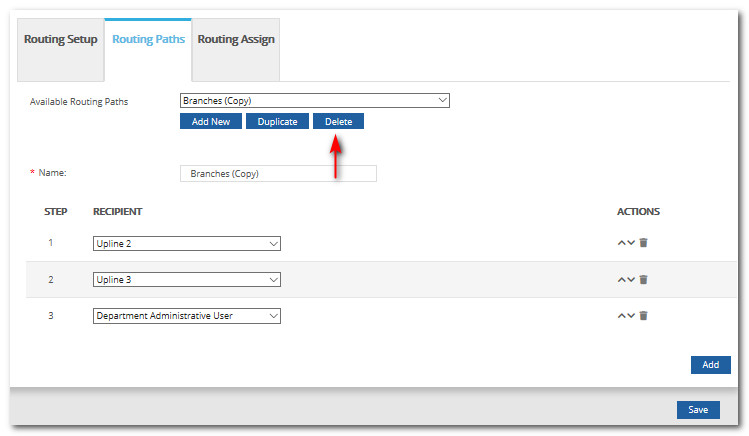
- From the "Available Routing Paths" dropdown, select the Routing Path.
- Click the Delete button.
- Click Yes to confirm the deletion.
Did this answer your question?
![HRPS Logo1.png]](https://knowledgebase.hrperformancesolutions.net/hs-fs/hubfs/HRPS%20Logo1.png?height=50&name=HRPS%20Logo1.png)
