![HRPS Logo1.png]](https://knowledgebase.hrperformancesolutions.net/hs-fs/hubfs/HRPS%20Logo1.png?height=50&name=HRPS%20Logo1.png)
Assign Course(s) to an Employee
To schedule courses or exams, do the following:
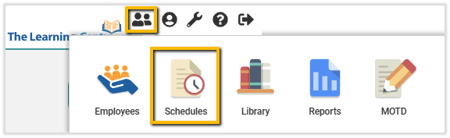
- Select Schedules from the Admin menu.
- The list of scheduled courses appears. Click Schedule on the toolbar.

- The New Course Schedule(s) screen opens in a new window.

- Specify that you want to schedule the course(s) or exam(s) by Employee Name.
- Select the employee’s name.
- Complete the following fields:
- Date Assigned – The current date will automatically be entered in this field. If you prefer, select another
- Date Required – Specify the date (if any) by which you want the employee to complete the course(s)/exam(s).
- Date Completed – This field is only used to manually enter completion dates for classroom courses and external courses and exams. Results from courses/exams from the e-Learning Library are automatically recorded once the employee completes the course/exam.
- Course/Exam Details – To schedule the coordinating course(s) or exam(s), select this checkbox, then enter the Date Assigned, and if known, the Date
- Overwrite Options – Specify whether the employee’s previous schedule will be overwritten (replaced) with a new schedule:
Warning: The Overwrite Options setting should be approached carefully if being used as there is potential to overwrite/replace existing course and exam schedules.
-
-
-
-
- No Overwrites – TLC will not overwrite a previous schedule if the course/exam has already been assigned to an employee.
- Overwrite Incomplete – TLC will overwrite a previous schedule if the employee has not yet completed the course/exam.
- Overwrite Incomplete or Failed – TLC will overwrite a previous schedule if the employee has not yet completed, or has failed the course/exam.
- Overwrite All – TLC will overwrite all previous course or exam schedules, regardless of whether the employee successfully completed them.
-
-
-
- Assign Courses/Exams to the Employee – If necessary, use the Filter Options to reduce the number of courses/exams displayed:
-
- Filter on Categories – Select to only display courses/exams within a specific
- Filter by Training Plan – Select to only display courses/exams within the employee’s training plan.
- Available Course/Exam, Assigned Course/Exam – Move the course(s)/exam(s) you want to assign to the employee from the Available pane to the Assigned pane.
If a course/exam is displayed in red, the employee has already been assigned the course or exam. Hover your cursor over the red text to see a completion date and an exam score (where applicable). Use this to determine whether to schedule the course or exam, or use the Overwrite Options if you don’t want to overwrite completed course or exam schedule.
7. Click Update to schedule the course(s)/exam(s) for the selected employee.
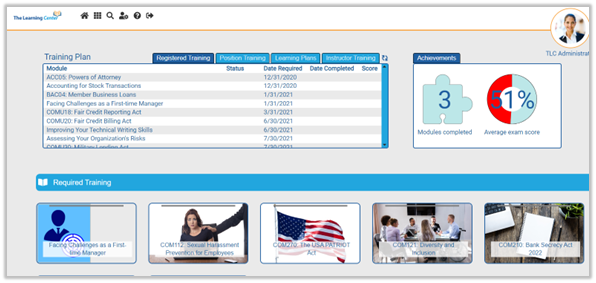
View an Employee's Training Plan
You can view an employee’s Training Plan, as it appears to that employee in TLC.
To view an employee’s Training plan, do the following:
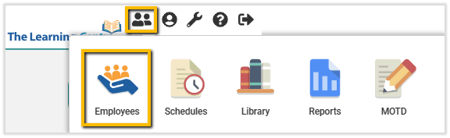
- Select Employees from the Admin menu.
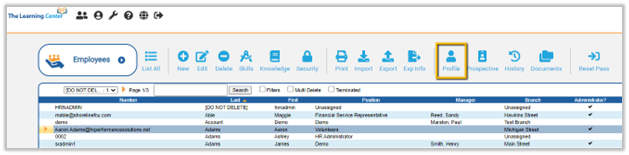
- The list of employee records appears. Select the employee whose Training Plan you want to view, then click Profile on the toolbar. The employee’s Training Plan will open in a new window or browser tab.
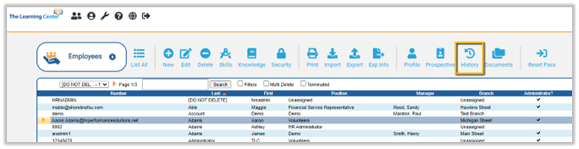
View an Employee's Training History
You can generate a printable training history for any employee. This provides a concise snapshot of the employee’s completed course and exam history for the selected period of time. Alternatively, you may also want to export the employee’s training information.
To generate a printable training history:
- Select Employees from the Admin menu.
- The list of employee records appears. Select the employee for which you want to obtain the history, then click History on the toolbar.
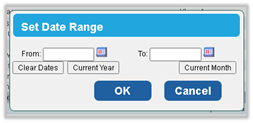
- Enter the range of dates for which you want to obtain the employee's history, then click OK.
- The employee's training history for the selected period appears.
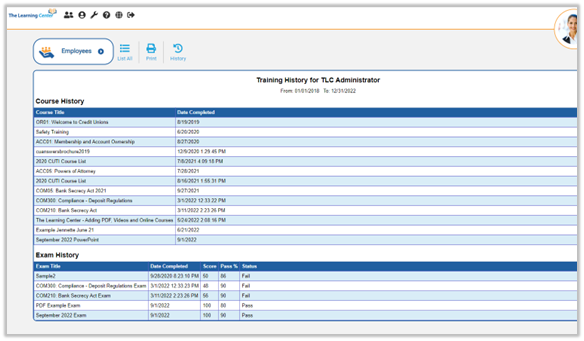
- To print the history, click Print on the toolbar.
Run a Basic Report
To run a basic report:
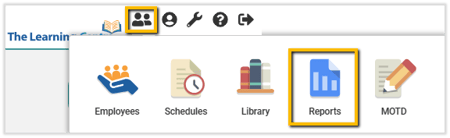
- Go to your Administrator page (this is the page that you see first when you log into TLC).
- Click on the Admin Menu, the Reports. The Basic Reports screen appears.
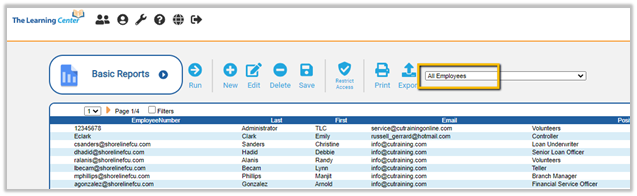
- Select a report from the BASIC REPORTS drop-down list on the toolbar. The selected report will appear within a few seconds (depending on the report selected).

- To print the report, click Print on the toolbar. The report data opens in a new window, and a Print dialogue box appears. Make any necessary changes to your print settings, then click Print to print the report.
- Once you’ve generated a report, you can export it for printing or for use in another application. Select the report from the BASIC REPORTS drop-down list. The report data appears.
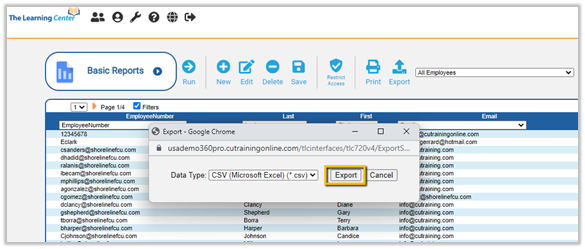
If you want to reduce the amount of data shown to just specific information, click the Filters checkbox, then specify the filter column and criteria (i.e., the choices in the filter column drop-down list). Click Export on the toolbar.
When the data type screen appears, click Export.

Run an Advanced Report
Advanced Reports automatically filter results and limit the display to just to the employees you are responsible for.
To run an advanced report:
- From the Administrator page (the page seen when first logging into TLC), click on the Admin Menu, then Reports. The Basic Reports screen appears.
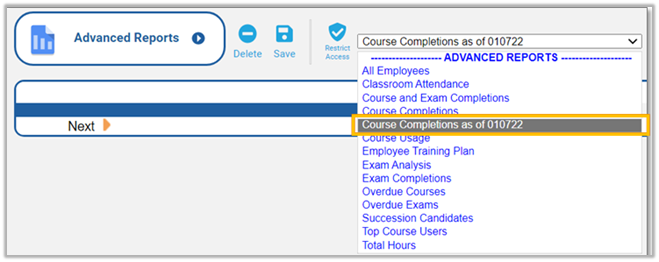
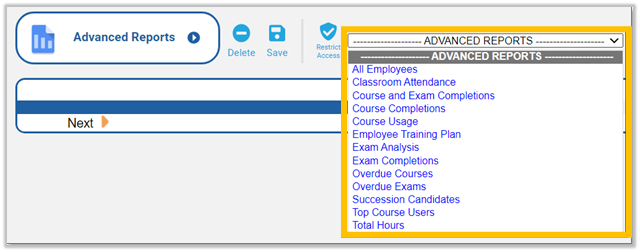
- Click the arrow next to Basic Reports, and select Advanced Reports.


- Select the report you want to run from the ADVANCED REPORTS drop-down list.
- Use the report’s filtering criteria to refine the report to the specific data you want to display. From each drop-down, use the checkboxes to select one or more values for each field. *Please note* that the fields and available values will vary, depending on the report you have selected. Click View Report to generate the report.
- Once you’ve generated a report, you can export it for printing or for use in another application. Click the disk icon and select the format from the drop-down.
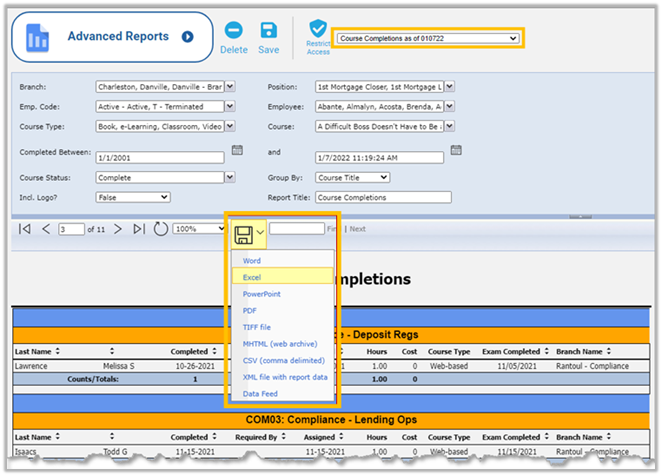
- To save your selections as a new report for future use, click Save on the toolbar. When prompted, enter a name for the new report, then click Update.
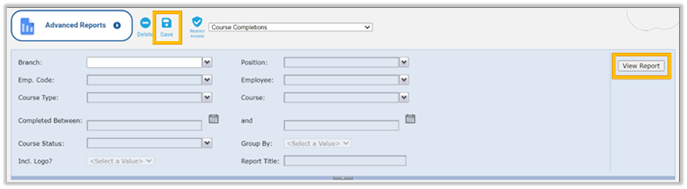
- The new report can be accessed from the Advanced Reports drop-down list.