Performance Pro Update v3.19.10 - Released 1/20/2020
Key Improvements: Routing, Multi-Appraiser View, Merit Table, Form Builder, Integrated with Compease, Export to FTP, & more
Update topics:
- Routing
- Appraisals
- New Peer Feedback Report
- Multi-Appraiser View
- Merit Table
- Form Builder
- Alerts Log Filtering
- Unassign a Shared Appraiser through Import
- Performance Levels – Integrated with Compease
- Export to FTP from Performance Pro
Changes to Routing
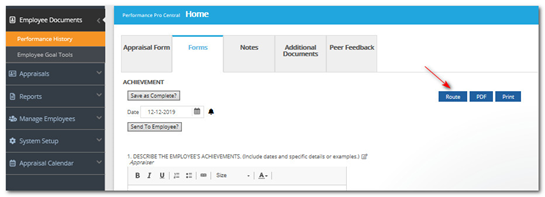
Form Routing
After the Route button has been clicked to route a form, a new Back button will appear to allow you to easily return to the form.

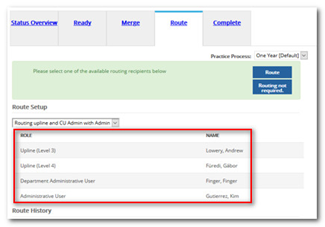
Preview of Manual Routing Path Recipients
If your default routing method is set to Manual Path Selection, appraisers will have a dropdown of available routing paths on the Route tab of the Finish Appraisal screen. Each dropdown option will provide a preview of the routing path recipients. This will be visible prior to clicking the Route button, enabling the appraiser to choose a different routing path, if desired. This applies to both appraisals and forms.
Adding and Viewing Routing Notes
When adding a note to an item that has been routed to them, users will see routing note input fields in a pop-up box without navigating away from the Home screen.
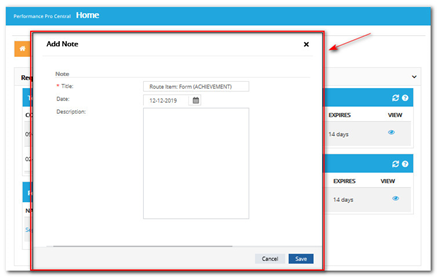
Once users enter text and click Save, the routing note will be saved to the Performance History > Notes tab and a note icon will appear beside the item in the “Routed Items Inbox.”
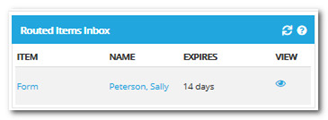
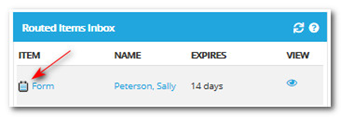
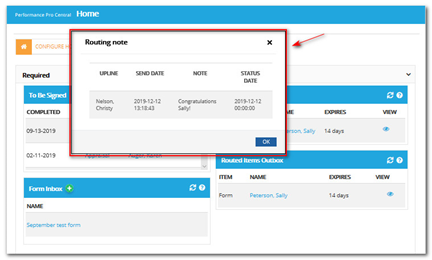
To view the routing note, users can click on the note icon in the Routed Items Inbox, where a pop-up window will appear and display all routing notes that are associated with the item. Click OK to close the pop-up window.
Changes to Appraisals
Allow Edits to Appraisal Scores After Merging
A new Allow Edit After Merge option has been added to Company Settings. If self-appraisals are set to “Optional” or “Required,” the setting can be activated. This setting will be disabled by default.

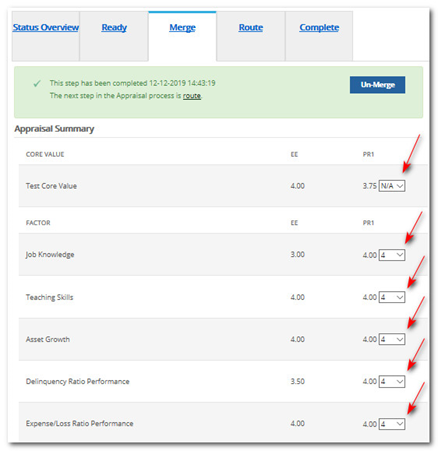
Once activated, a scoring drop-down box will be added to the Merge tab for each evaluation criteria (Core Values, Factors, Goals.) The appraiser can change their own scores after the merge by using these boxes. This will be available for the appraiser signed in, the Administrative User aliased as the appraiser, or the Administrative User signed in as themselves in the Administrator role.
Employee Goal Progress Bar
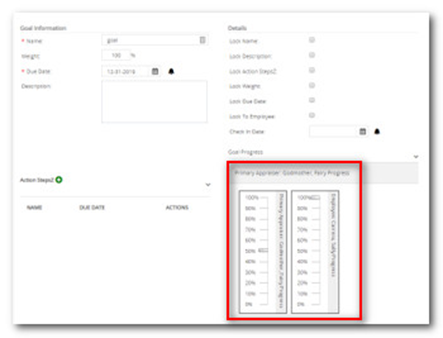
The Employee Goal Progress bar (in percentage format) will now display on the Employee Goal Tools screen beside the Appraiser Goal Progress bar, if “Set Progress” and “Display as Percentage” is activated.
Changes to Reports
Updates to the Goal Progress Report
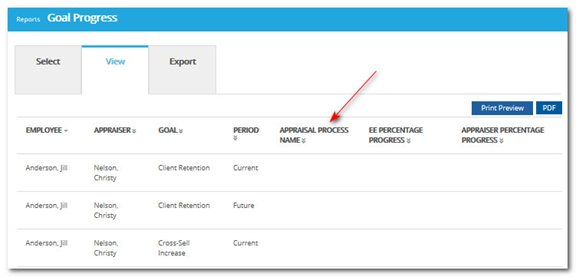
Goals from concurrent appraisal processes will now be included in the report along with a new column titled “Appraisal Process Name.”
New Peer Feedback Report
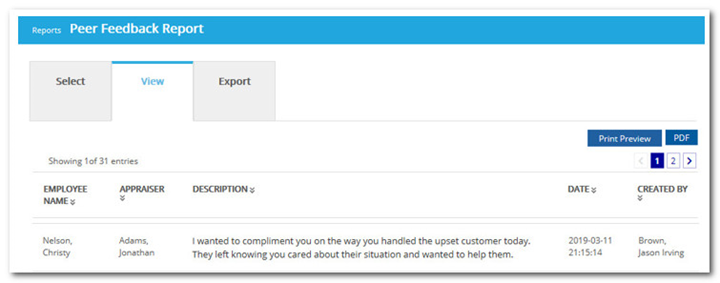
A new report titled “Peer Feedback” has been added to the Reports > Other category. This report will be available to Administrative Users, Company Unit Admins, and Appraisers (unless the Peer Feedback feature is hidden.) Users can filter and group report contents similar to other reports.
Miscellaneous Changes
See Multi-Appraiser View by Default
If the Administrative User selects Multi-Appraiser view in the Default Appraisal View dropdown in Company Settings, currently it only shows the Multi-Appraiser view of the appraisal after all appraisals are merged.
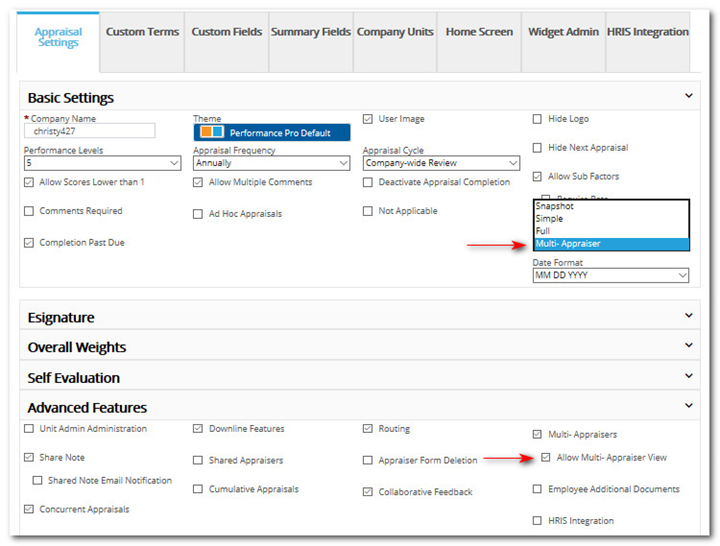
With this release, if "Multi-Appraiser" view is selected from the "Default Appraisal View" dropdown AND the new feature - “Allow Multi-Appraiser View” - is selected from the Advanced Features area on the same screen, then Administrators, Appraisers, and upline users will see the multi-appraiser view by default at any point in the appraisal process, not just post-merge. It will be seen when clicking the View Current Appraisal button on the evaluation screens or from Employee Documents > Performance History.
Merit Increase – Adjust Merit Pay Table
A new field titled Weekly Hours was previously added to the Manage Employees > Employee Data > Salary tab. Now, if an employee is designated as “Hourly” and has hours entered in the Weekly Hours field, the weekly hours will be applied appropriately in all calculations appearing on the Adjust Merit Pay table.
Form Builder
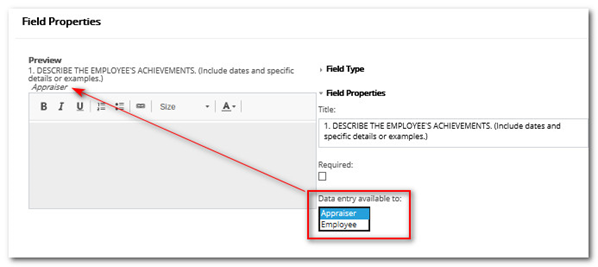
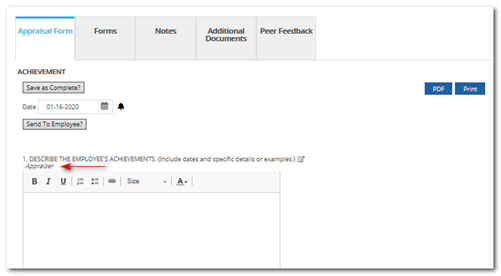
When forms are created on the System Setup > Content Customization > Form Builder tab, the Administrative User designates which type of user (Appraiser or Employee) is to complete each field. That designation will now appear below the description of the field on the actual form, making it easier to identify which user should populate the field.
Alerts Log Filtering
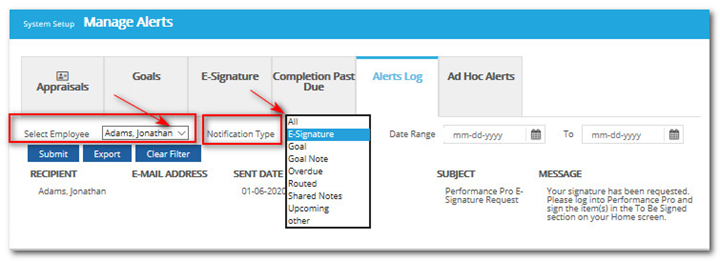
The alerts log found at System Setup > Manage Alerts > Alerts Log tab keeps a record of all alerts sent from the application. There are now two filtering options: “Employee” and “Notification Type.” The “Employee” option allows Administrative Users to select a user in order to view only the alerts related to that user. The “Notification Type” filter allows for filtering by the following types of alerts: All, E-Signature, Goal, Goal Note, Overdue, Routed, Shared Note, and Upcoming.
Unassign a Shared Appraiser through Import
Shared appraisers can now be unassigned via an import. This will remove those users from being an appraiser without having to add another shared appraiser to the employees’ profile. Entering “None” in the Appraiser 2 column of the import file will unassign the shared appraiser when the import is executed. Any weight assigned to the shared appraiser will be re-assigned to the Primary appraiser.
My Items Widget
The My Items widget was updated to correct a display issue. A scroll bar was also added to the widget to allow users to scroll through the list of items.
Performance Levels – Integrated with Compease
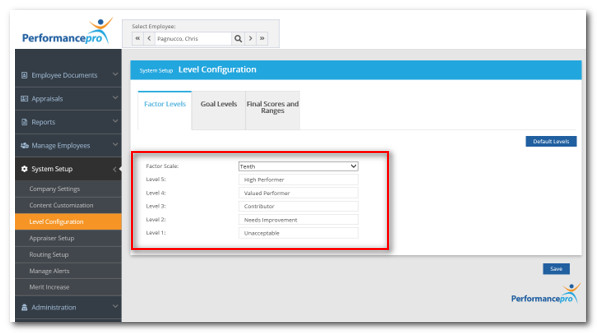
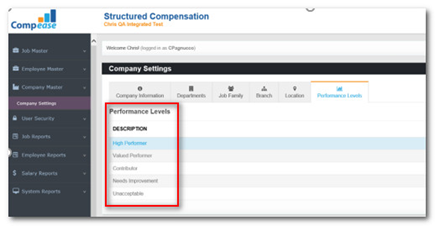
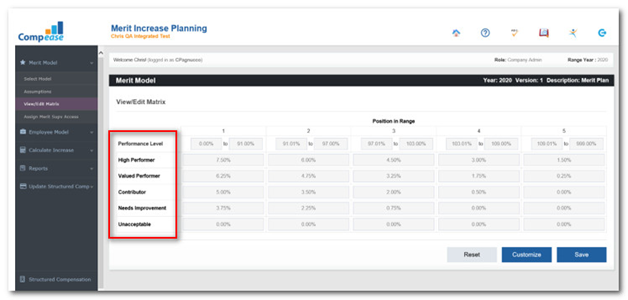
In Performance Pro sites integrated with Compease, any changes made to the number of “Performance Levels” on the Performance Pro System Setup > Company Settings > Appraisal Settings tab will be reflected in Compease, both in the Structured Compensation and the Merit Increase Planning sections.
Export to FTP from Performance Pro
This feature will allow Administrative Users to build and schedule an automatic CSV file export to share appraisal scores with the client’s payroll/HRIS/HCM application. Prior to using the export feature, please contact the HR Performance Solutions team to obtain the necessary data that your IT team will need to provide. Once we have configured your connection initially, you can begin using the custom export feature. This will ensure that the file will be properly accepted.
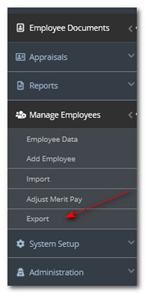
An Export item will now automatically appear in the Manage Employees section of the main menu, visible only to Administrative Users. Once clicked, the Build File screen will appear.
Build File
The file is built in the Build File section. Fields are selected from the Select Fields column which will then populate the Field Name field. The Field Name can be overwritten if desired and will become the column header of the CSV file for that data. If the Field Name field is empty, that data will not be included in the CSV file.


Administrative Users will have the ability to select from the following fields for inclusion in the export:

Schedule Section
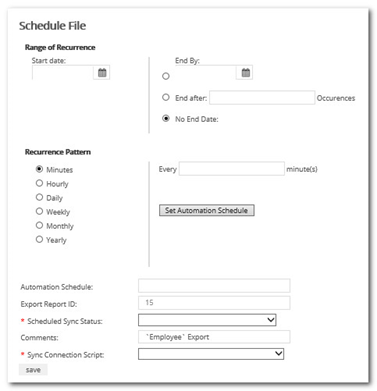
Once the desired fields are selected, click Done at the bottom of the screen. The Schedule File screen will appear. Administrative Users will need to set up a start date, end date, and recurrence pattern for the export to run. If no end date is entered, the file will run indefinitely on the chosen recurrence. Recurrence options include: hourly, daily, weekly, monthly, and yearly.
Once the range of recurrence and pattern have been selected, you MUST select the Set Automation Schedule button. This will populate the Automation Schedule field below. Select Active from the Scheduled Sync Status dropdown to activate the scheduler and select your unique Sync Connection Script from the dropdown. PLEASE NOTE: If you DO NOT have any selections in the Sync Connection Script, stop and contact HR Performance Solutions to obtain the information needed to establish your connection.
Did this answer your question?
![HRPS Logo1.png]](https://knowledgebase.hrperformancesolutions.net/hs-fs/hubfs/HRPS%20Logo1.png?height=50&name=HRPS%20Logo1.png)