![HRPS Logo1.png]](https://knowledgebase.hrperformancesolutions.net/hs-fs/hubfs/HRPS%20Logo1.png?height=50&name=HRPS%20Logo1.png)
You can use Mentor Pro to create courses from a variety of sources, including PowerPoint presentations, PDF files, and graphic files.
Please note the following requirements and restrictions on slide shows to be imported into Mentor Pro:
-
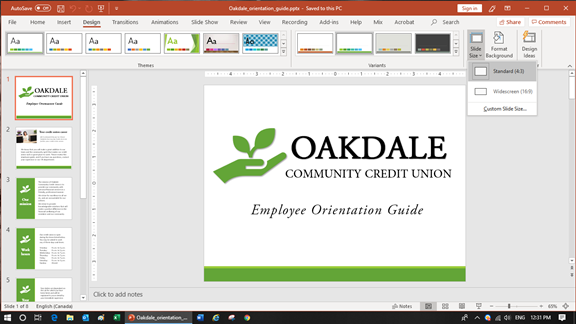
The aspect ratio (slide size) of the slide show you want to import into Mentor Pro must be 4:3. To check/change this in PowerPoint, click Design, Slide Size.
-
Ensure each slide's content is accurate before exporting it. Because each slide is exported as an image, once they've been imported into Mentor Pro, you can't edit the slide's content (e.g. text or graphics).
-
Animations or transitions in the slide show are discarded when the slides are exported as images.
In PowerPoint, do the following to export the slides:
-
Open the slide show you want to export.
-
To export just certain slides, select those slides, OR to export all slides, select any single slide in the presentation.
-
Select File > Save All or Save a Copy. When prompted, enter a name for the exported file, and change to png graphics format.
-
Select a location to which the file will be saved on your computer, using Browse. A message will prompt asking which slides you want to export.
-
Select the appropriate button, depending on how many slides you want to export.
-
Note that if you choose to export more than one slide, PowerPoint will create a new folder for the exported images; so, when you import to Mentor Pro you will select the whole folder.
-
Importing the graphics slides into Mentor Pro
In Mentor Pro, do the following to import images files:
-
Ensure the graphics you want to import are all located in a the same file folder.
-
Access Mentor Pro from TLC.
-
From the Mentor Pro home screen, click Create. The Create Course/Exam page appears.
-
Enter a name for the new course, then select 'Course from PowerPoint Slides' and click OK. Another screen will open, prompting you to select the file you want to upload.
-
Click Select Files. Navigate to your image(s) by opening the folder of your converted slides, select the slide(s) you want to import, then click Open. The files will be imported into Mentor Pro. [To locate the images, click on 'My Files' and they will be in the powerpoint folder.]
-
Locate the new course in the list of existing Mentor Pro courses and exams, then click Edit. The authoring screen will open in a new window. Under the contents in area of the screen, each slide is a stand-alone page of the course. If you imported graphics that were originally a slide slow, each page is named for the title of the slide show, and numbered incrementally. You may enter a new title for the page to better reflect its contents under 'Title:'.
-
If desired, add any Mentor Pro elements (e.g., text, graphics, shapes, etc.) to each page, just as you would any other Mentor Pro course.
-
After finishing edits to a page, you must click Save.
-
- To ensure that the course is tracked in TLC, be sure to add a Congratulations page after the last page of the course. Click Create Page and select Congratulations in the list of templates and then click Save.
Adding the completed course to TLC from Mentor Pro
- When the course is ready to be added to TLC, click on the course and then click Add to TLC.
- Choose where you want it to exist in the Library by selecting the Type and Category for the course, then click Add.
- You will now see the course as Active in your Library and ready to schedule.