- HR Performance Solutions Help Articles
- Compease
- User Security
-
The Learning Center
-
Performance Pro
- Administration / Manage Users
- Employee Documents / Performance History
- Performance Pro Home Screen
- Appraisal
- Employee Documents
- Administration
- System Setup
- Manage Employees / Employee Data
- Manage Employees
- Performance Pro Home Screen / Home Page
- System Setup / Content Customization
- System Setup / Manage Alerts
- System Setup / Routing Setup
- System Setup / Company Settings
- Webinar Materials
- Appraisal / Finish Appraisal
- Administration / Storage
- Advanced Analytics
- Launching Performance Pro
- Settings
-
Performance Pro - Admin User - New Interface
-
Compease
- Compease FAQs
- Merit Increase Planning
- Compease Reports
- Job Master / Job Maintenance
- Data Bridge
- User Security
- Company Master
- Job Master / Salary Survey
- Employee Master / Employee Maintenance
- Job Master / Archived Jobs
- Employee Master / Archived Employees
- Common Functions
- Compease Training
- Compease Integration with Performance Pro
-
Commonly Asked Questions
-
Release Notes
-
Data Integration
-
Performance Pro Manager Training
-
Performance Pro Employee Training
-
Manager Resources
-
Compease Starter
-
Performance Pro - Manager Training - New Interface
-
Performance Pro - Employee Training - New Interface
User Security: Assign an Access Level - Compease
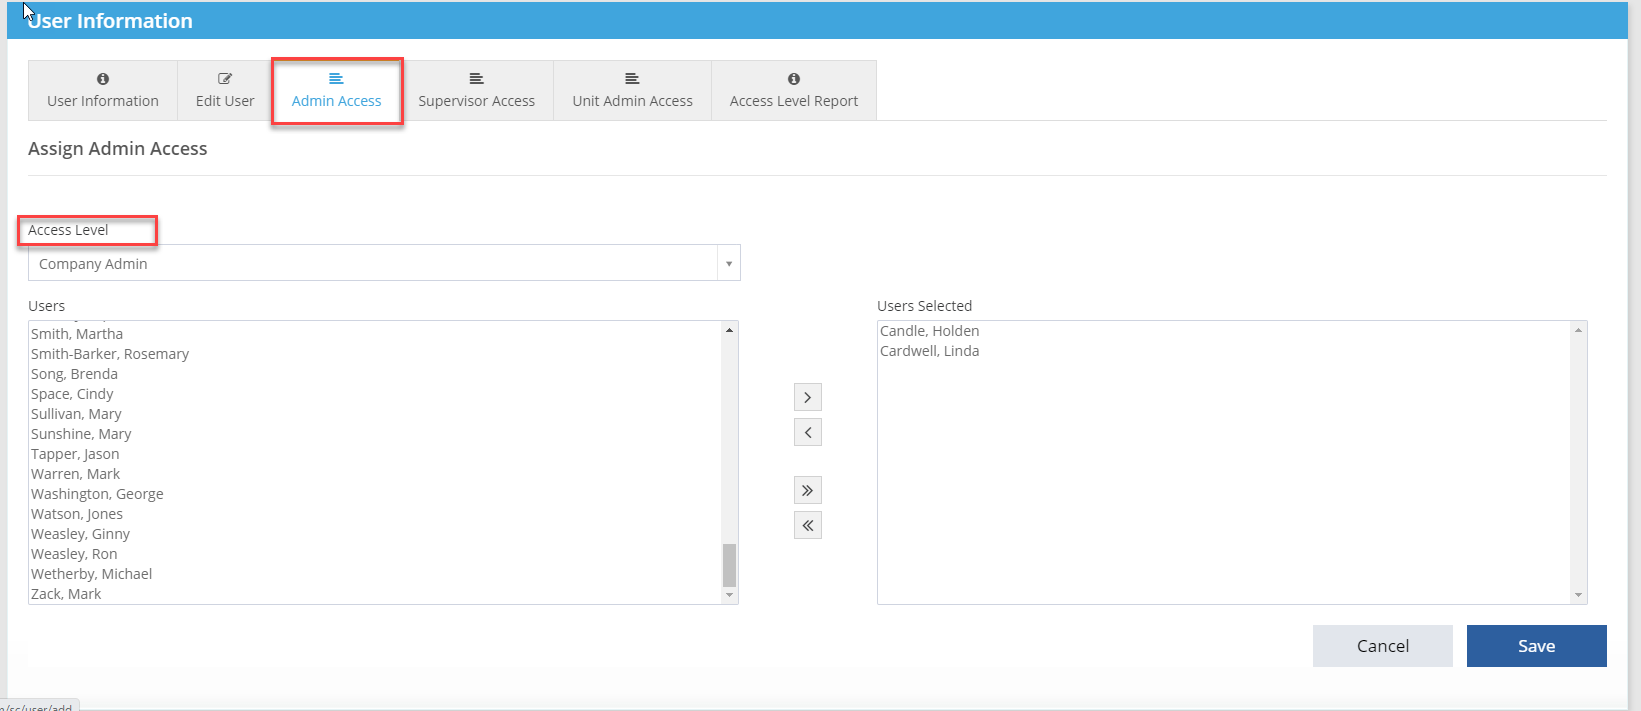
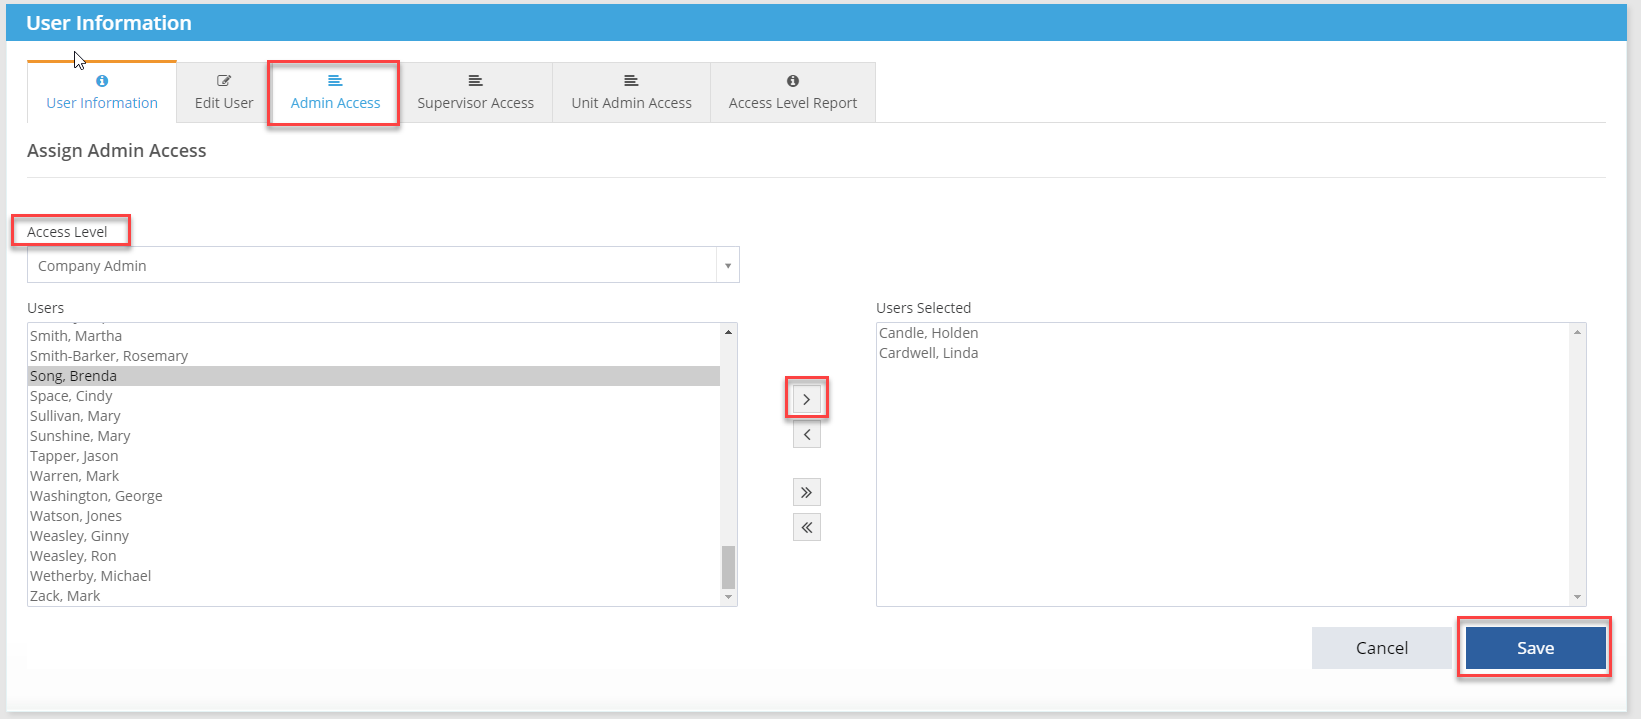
User Security --> User Information --> Admin Access:
- Select the access level from the drop-down menu.
-
Select the employee.
-
Click single arrow pointing right to move employee to User Selected.
-
Click Save icon.
-
Once access is assigned, provide employee with the URL, their username and temporary password. For instructions on resetting a password, see reset password article.
- Compease users can be assigned multiple access levels. Follow the same steps to assign another access level such as Supervisor or Unit Admin.
- To view who has access to Compease and what access level the users have been assigned, click on the Access Level Report tab.
See below for a video of these instructions.