Ad Hoc E-mail Alerts and Calendar Invites - Performance Pro
Use Ad Hoc Alert to send a customized e-mail message or calendar invite to any other user from several areas within the program.
The Ad Hoc Alert icon can be found in the following locations:

-
The Toolbar
-
Employee Goal Tools > Current Goals tab - near goal Due Date field and Check In Date field
-
Employee Goal Tools > Current Goals tab - Action Step Due Date (accessed when you click the Add Action Step button)
-
Employee Goal Tools > Current Goals tab - Goal Note Due Date (accessed when you click the Add Note button)
-
Manage Employees > Employee Data > Settings tab - near the Appraisal Settings dates
-
Employee Documents > Performance History > Forms tab - near Date field (accessed when you add a Form)
Note: Users must have an e-mail address entered on the Employee Data screen in order to be eligible to receive these alerts. Calendar invites will route through the user's calendar application/client (Outlook, etc.)
Clicking on the Ad Hoc Alert icon from any of its locations will open the alert options. The alert options are an E-mail or a Calendar Invite. Clicking in either checkbox will open additional fields. Users have the ability to select the E-mail and Calendar option so that the alert goes out in both formats. Whichever option you choose, simply select the other option too when the additional fields open.

Sending an E-mail Alert
When you click the E-mail Alert box, additional fields will appear. If you wish to also send a Calendar Invite, click the Calendar Invite checkbox.
The "From" field will auto-fill with the e-mail address from the Employee Data screen of the sender. The "To" field will auto-fill with the name of the user currently selected in the employee selection tool.
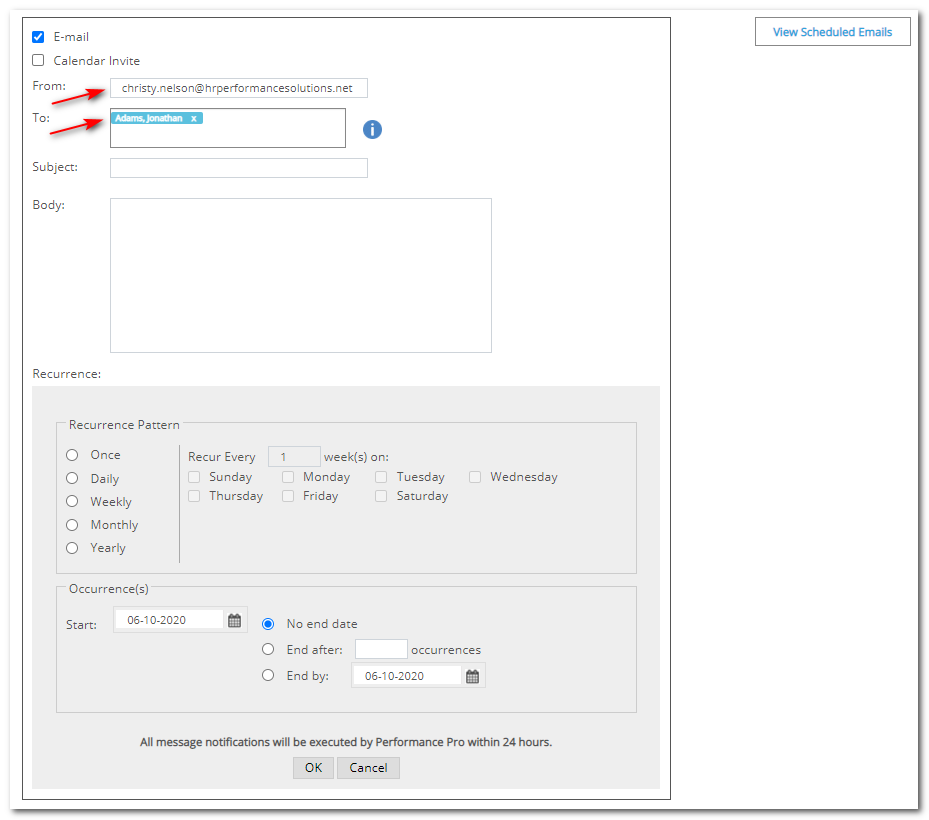
To enter additional recipients, insert your cursor in the "To" field and choose recipients from the list that appears then click Select.
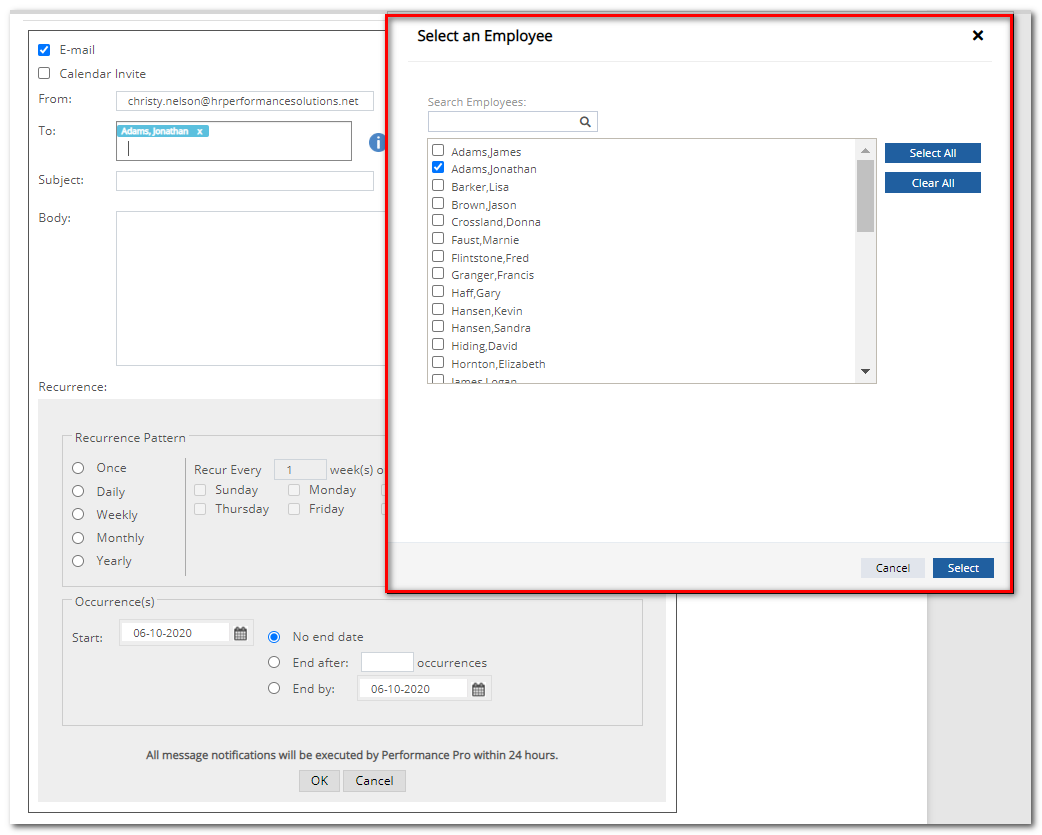
Enter the subject of the alert in the Subject field and the text of the message in the Body field.
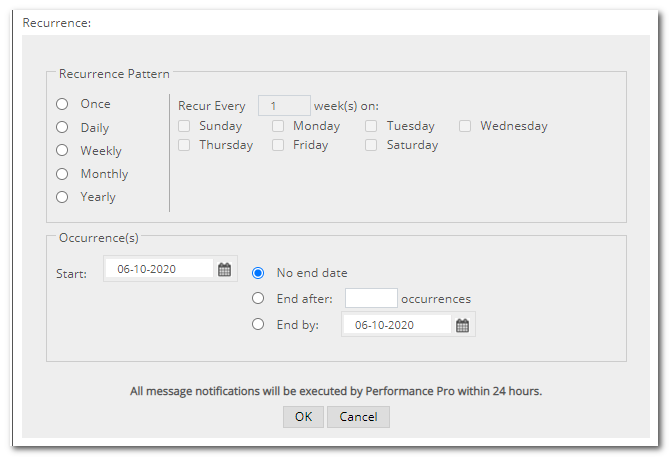
Customize the recurrence options according to how often you would like this message sent. If you choose Once, no further options need to be selected.
Click OK to send the message. One-time e-mail messages will be sent immediately but calendar invites will be scheduled based on the start date.
Clicking View Scheduled Emails will display a listing of all recurring e-mail notifications the user has initiated (see below.) If a recurrence has been set on any alert it can be deleted, if necessary, by using the delete icon in the recurrence column of the log.


Note: All calendar recurrences must be removed separately from your calendar application/client (Outlook, etc.)
Sending a Calendar Invite
The From, To, Subject, and Body fields all function the same whether you choose E-Mail or Calendar Invite. However, if you choose Calendar Invite, there is an additional option in the Recurrence section that lets you specify the time and duration of the meeting invitation. The Calendar Invite will go through the user's calendar application/client.

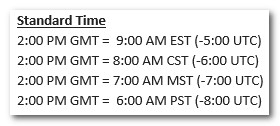
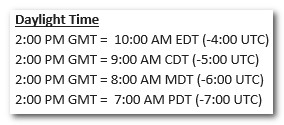
Note: All meeting times will be scheduled in GMT, which is 4 hours ahead of EDT. Please schedule your meeting accordingly. Below is a conversion chart to aid in setting the time.
Did this answer your question?
![HRPS Logo1.png]](https://knowledgebase.hrperformancesolutions.net/hs-fs/hubfs/HRPS%20Logo1.png?height=50&name=HRPS%20Logo1.png)